Showing posts with label Ineptitude. Show all posts

Wednesday, March 12, 2014

The WIP That Wasn't

I mentioned a while ago that I started making a quilt for my best friend's new baby...

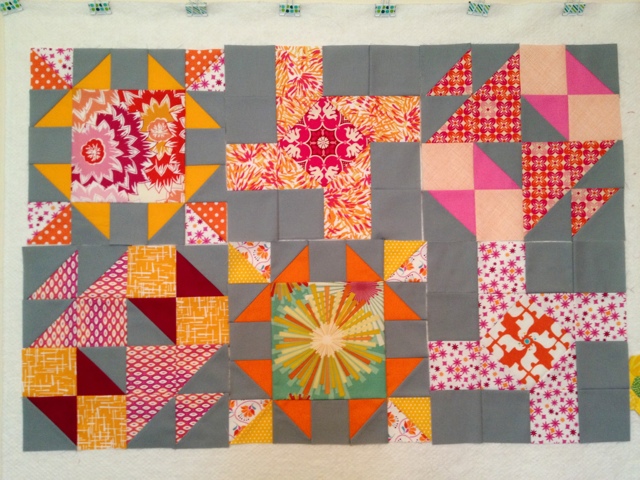
I just wasn't feeling it though. I like it, but I felt like I was "forcing" it, if you know what I mean? I thought for a long time what I wanted to do, but nothing was really clicking. So of course, feeling crunched for time (the baby was born in december) I just started with some fabric I liked, and a pattern that I have been wanting to do for a while.

It's not pieced yet, but I intend to finish it. I might sell it, or give it to someone else. I haven't decided. Have any of you ever sold a quilt on etsy or something before? How did it go?

Untitled

Untitled


I really like what it turned into, but it just doesn't feel "right" for her. So that's what the pretty pile of repros from the other day are for - baby quilt take 2! I saw a quilt on pinterest or something and knew right away that it was perfect. Hopefully in the next week or so I can get it started! :-)

Thursday, July 18, 2013

Starting something new...

Man, my blogging has really slowed down lately! I promise I'm actually doing stuff, but I've definitely not been as productive as I'd like. BUT I have a finish to show you tomorrow!

Because of the recent finish, I started a new project last night. Well, I cut the fabric. And then realized that I had miscalculated and needed to buy more. So I started to start a new piece, anyway.

The start of something new...

The start of something new...

Red is so hard to photograph... any tips?


So after I cut all that, I decided to make a prototype block in a smaller size. Yeah. It was 4am. This block came out at 5 1/2" square. It was supposed to be 8 1/2" square.

At least the fabric I cut was right.

The start of something new...

Monday, June 3, 2013

That time I had to un-do my un-doing...

Or, alternately, "how I managed to screw up one of the easiest blocks in the history of the world."

I tell ya, my blog earns its name.

I've been making progress on my scrappy trip, and the other day I had a big ol' stack of blocks that were at the point where they were in the little pieced strips, but still needed to be seam ripped into the different strips for the block. Go here if you are royally confused. I'll wait.

See the pile of plates on the top left? Those are the ones to which I refer...

Making progress on my scrappy trip!

Ok, so these blocks and I were sitting on the couch, watching netflix and seam ripping (Prison Break, I think?) and apparently, I can't multitask that well.

Because this happened:

I managed to screw up one of the easiest blocks in the history of the world. #talesofineptitude

Yep. Somethings not right... At least I figured it out before I put the whole block together. But I had to seam rip the two rows I put together, and then re-piece the strips that were wrong, and then seam rip them at the right places, and then sew the rows back together to make the block.

I'm a winner.

BUT! I have a pretty stack of blocks that are all done and ready to be pressed and trimmed. So yeah, I win.

Making progress on my scrappy trip!

They're very fluffy. I have the urge to squish them.


Monday, March 25, 2013

Live and Learn?

Remember the Skill Builder BOM that I've been working on? Well, this BOM is utilizing a quilt as you go method (which is new to me - yay!) and I quilted the January blocks a few days ago.

I got this super pretty spool of variegated purple Aurifil, thinking that the purple would blend with all the different purple fabrics, and complement the aquas nicely.


Well, it did, but I am not a fan of how it looks on the white background. I can't decide if I should live with it, take it out, or re-do these blocks altogether.


What do you think? Maybe part of my problem is that I'm not a big fan of stippling? Don't be fooled by these pictures, it looks even worse in real life...

Wednesday, March 13, 2013

Sometimes my blog REALLY earns its name...

I went to do the March blocks of the Sisters Ten BOM last night (you can catch up on January and February too, if you want!). Chaos ensued.

Seriously, it was a comedy of errors.

I cut out all my pieces. So far, so good.


Oh wait, I realized I had cut some of them for 9" blocks instead of 12" blocks. Dangit. Recut.

On to chain piecing HSTs. Nothing new here, I've done this a gazillion times.


But this time my 1/4" foot decided to eat some of my corners. The top layer of fabric was catching on part of the foot. Annoying, but I'll trim these guys up anyway, so no big deal.


Oh crap. I pieced all of the HSTs together WRONG sides together. Rookie mistake - this one actually pissed me off. I must really be on auto pilot!


Commence the ripping and re-piecing.


Oh wait, then I noticed I somehow pieced the selvedge of one print into a block. I have NO idea how I missed this one.


Laying out the block before final piecing - yeah, these colors are not quite right. Re-cutting AGAIN.


Much better. Now lets see if I can put these kids together without incident.


Apparently not. See that upper left corner? More ripping.


Sigh of relief. They're both done, and somehow I didn't tear my hair out or throw anything. Somehow.


Next time I promise I'll pay better attention. Maybe.

Tuesday, February 19, 2013

Quilting a monster

I started quilting my xplusalong the other day. It's definitely the biggest quilt I've ever machine quilted. I've done other big ones either by hand quilting or tying.

I'm doing a pretty simple straight line grid with the walking foot on this one, because I figured that would be the easiest based on its size. I'm using a really pretty pale pink Aurifil 50wt.

Yeah. Manhandling that beast through my machine was a lot harder than I expected! And I have a large harp machine!

Part of my problem is that my set up isn't ideal. My table is relatively small, and I don't have a drop-in table. The quilt kept catching on the edges of my extension table. I improvised with some tv tables to catch the edges of the quilt, and at one point I was using (clean!) rubbery gardening gloves to get a better grip. The process was getting smoother the more lines I did, but it's still going to take a lot of trial and error.


Tuesday, February 12, 2013

Rip it real good

I picked up my grandfather's quilt last night to work on the quilting. It had been pushed to the bottom of the pile while I was working on my sister's quilt and xplusalong. I'm really pumped to quilt Sunshine Daydream, but I really need to finish this one first.

So I started a while ago quilting with gray Konfetti in the top and the bobbin, but realized too late that I should have used red in the bobbin, to match the backing. So when I picked it up again, I did that. I started quilting and about 30 seconds in, I realized that the red was *juuuuust* peeking through the top, so I adjusted the tension and kept going for a few more seconds. Not bad, but it really bugged me. I need to fiddle with the new machine's settings for a bit before I try to quilt with drastically different colors like this. So I pulled the quilt out, and changed the bobbin again. Then I realized that if the back had four square inches of red thread and the rest was gray, it would really bug me.

So that's how 45 seconds of quilting became an hour of seam ripping. But hey, that's one of the reasons I put a tv in the studio, right?

You'll see in the pictures that I started with stippling, but decided to do some pebbling after I ripped that out. So I guess it's a good thing, right?

I love this backing, I scoured for it online with no luck and then happened to find it at one of my LQSs. It has little planes on it - my Grandfather is a retired AF pilot. It was tough finding an airplane print that wasn't cartoony!


Thursday, October 25, 2012

Binding Fail

I made a quilt for a friend of mine at work who is having a little girl. I made the quilt top in one evening and quilted it the next evening. Then I went to start binding it.

So I've bound a few quilts in my day, but I'll be honest, it's been a little while. Apparently I'd forgotten how wide I usually cut my binding strips. You can see where this is going.

My binding barely covered the edge of the quilt on the back side. and in some places the edge of the backing was peeking out of the binding.

To make matters worse, I somehow thought that machine stitching the binding, instead of the usual hand whip stitching, would help.

I was wrong.

You can see how the stitching on the binding left this little floppy edge. And this stretch wasn't even the worst. You can see another line of stitching below the binding where I had already attached another line of (correctly sized) binding. Which I turned and stitched by hand. Why do I always make things harder than necessary?


But in all, it turned out well. Lessons learned, etc. I'll never forget to check my binding width again!