I actually have a finish for Finish-it-up Friday! I really have a couple things to show you, but this one is actually done AND photographed!
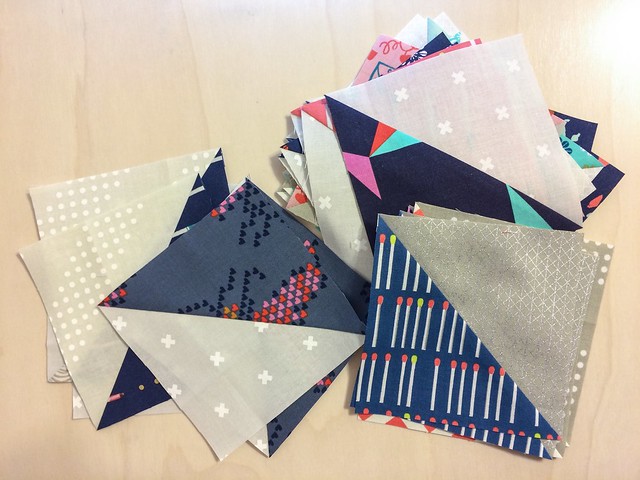
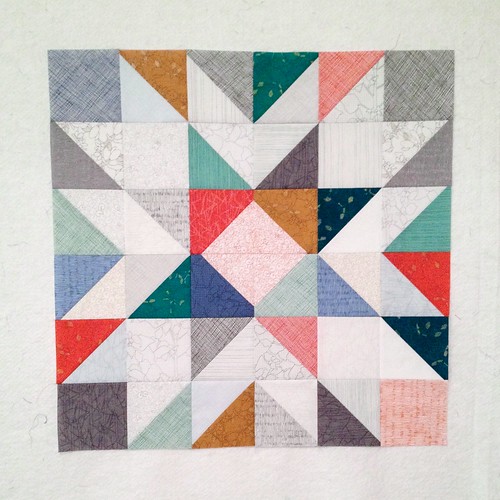
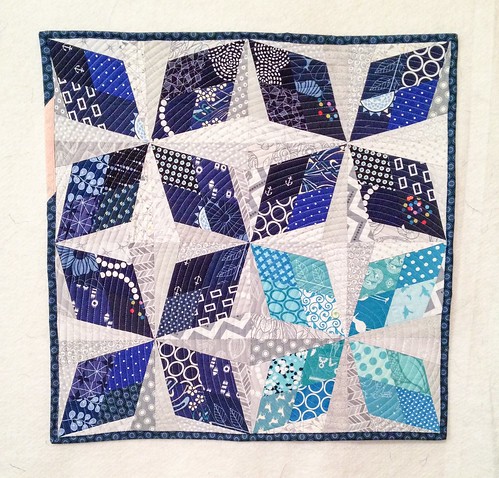
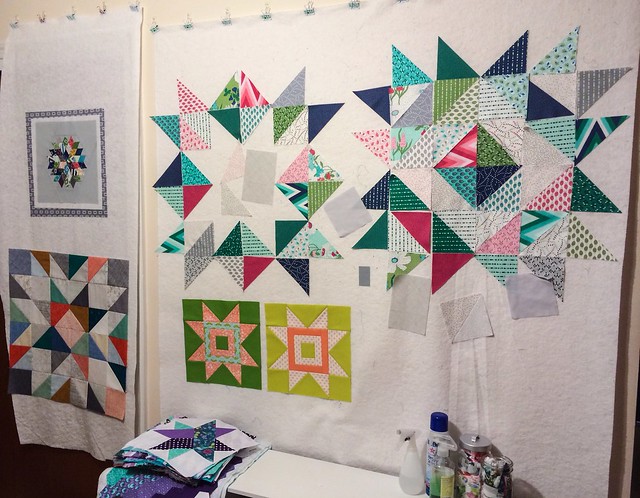
I made a pillow top out of mini charms aaaaaaages ago, and it sat on my design wall forever while I contemplated how to quilt it. Like ages.
I found this picture of it's early stages on my Flickr. Taken in MARCH. Don't judge...
So it sat, and sat, and sat... and then divine inspiration came in the form of a blog post from Christina at A Few Scraps. She actually has a book out that is ah-may-zing, so you should get it. And she has no idea that I even exist, much less rave about her book, so you can trust my honesty!
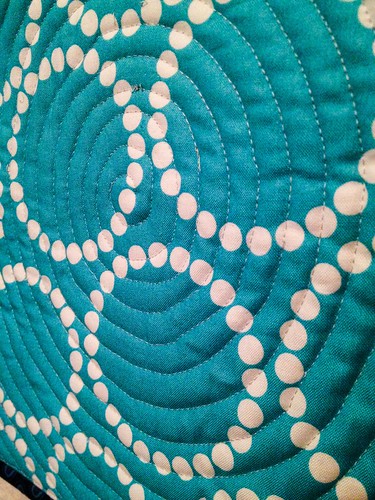
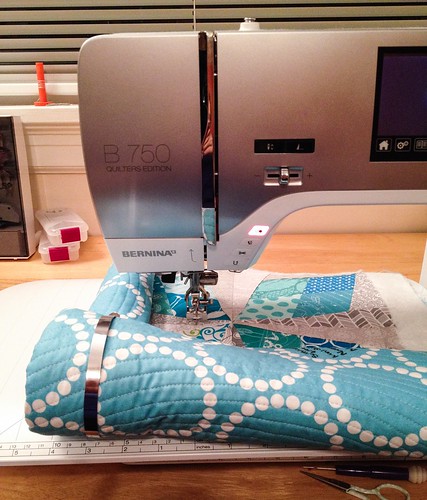
So I saw that post, liked the design, and just sat at my machine and went to town. I didn't draw it out beforehand (maybe I should have!) but I think it turned out ok anyway. I have to say, when inspiration strikes, I don't have any patience!
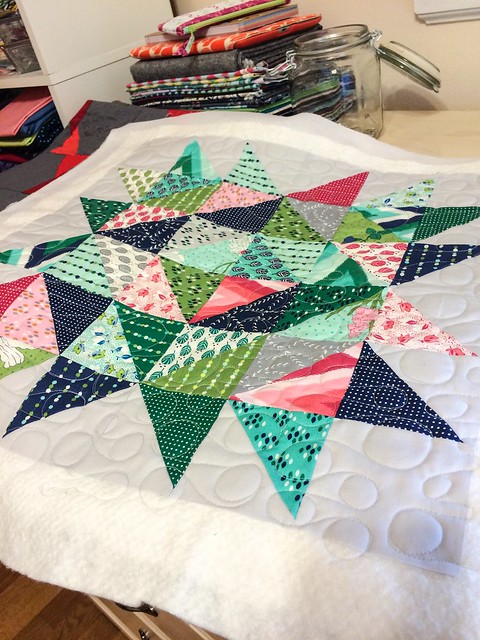
I even managed to quilt it and make it into a Real Pillow on the same day! I know, right??
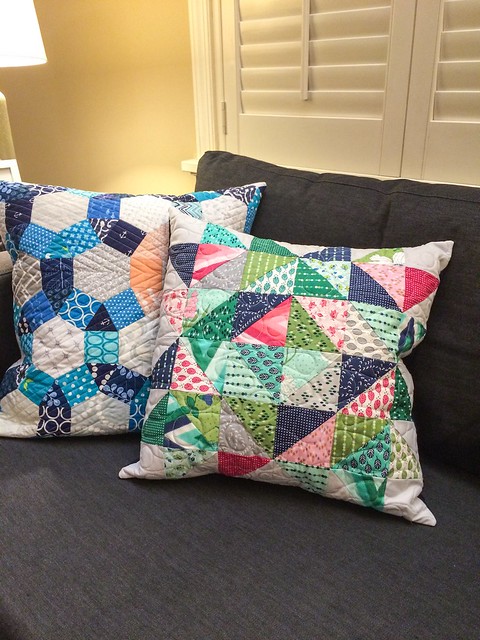
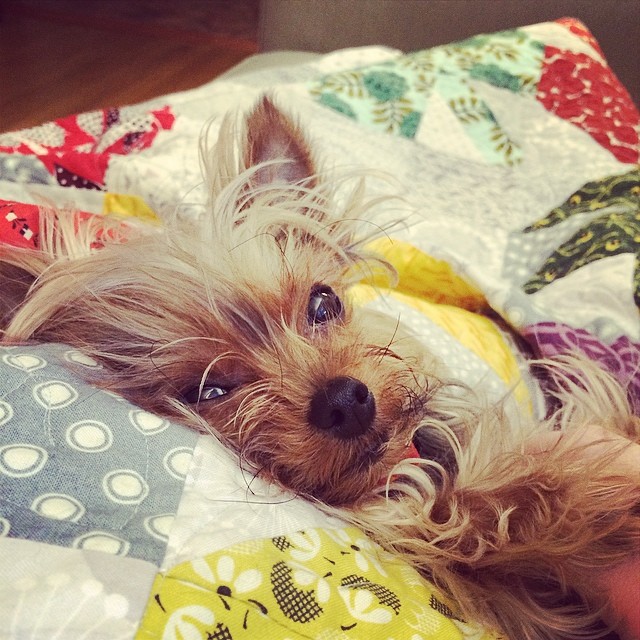
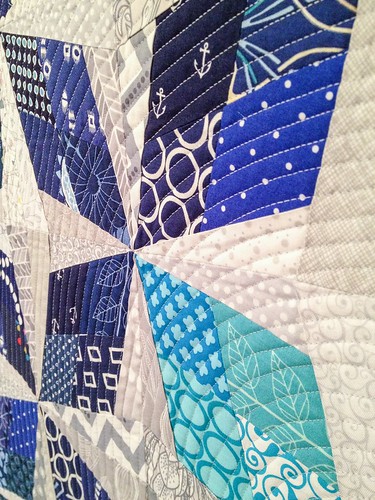
Doesn't she look so pretty next to her friend? Charlotte approves, though I don't have photographic proof.
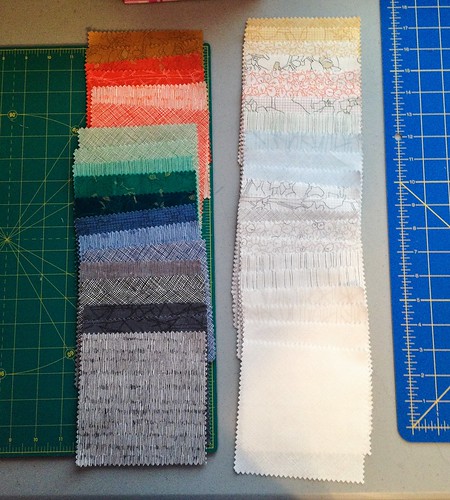
I even started a little something else the other day, that I'm super stoked about. I've just hit a snag until more background fabric comes in the mail!
Showing posts with label Machine Quilting. Show all posts
Friday, November 7, 2014
Monday, March 17, 2014
Then all of her dreams came true...
I got myself a present when I went to the Mid-Atlantic Quilt Show... Remember when I brought Bridget home almost a year and a half ago? Since then I've wanted to get a drop-in table so I can quilt on a flat surface.
I tried the Gidget table, and it was way too rickety when quilting, so I returned it. I also looked into Horn and Koala tables, and was disappointed with the quality for the price. So then I looked into building one from components from Ikea/Home Depot, and that would have worked, but wouldn't have a lift capability. I even looked into having one custom made by a carpenter friend.
So when I was at MAQS a few weeks ago, I saw this...
Isn't she pretty?! Solid wood, with a lift, and look at what she does!!!
There is also this little weird drawer thing on the right side, and when I saw it I had no idea what I would use it for, but look - all my little stuff that I need to have on hand when I'm working fit in there perfectly! And I don't have to have everything cluttering the top of the table!
This is exactly what I wanted, with no extra bells and whistles, and I didn't have to pay extra for the flip up table in the back, or the pull out thingy on the left. Perfect! It was a little bit of an impulse buy, so I called my Dad to talk me out of it. Of course he said that since I've been looking for a table like this for a year and a half, I should get what I want. And since it is really good quality solid wood, he said that I could pass it down to my daughters one day. Way to make me tear up in public, Daddy, thanks.
I would love to be playing with it, but I had some minor surgery on Friday and I've been on the couch since! Charlotte is doing a very good job of taking care of me, though - she's a good snuggler!
Monday, December 16, 2013
Belated Finish
I actually finished this quilt quite a while ago... like just after Thanksgiving.
But then the Christmas rush started.
And then I became obsessed with knitting.
And then finals.
Excuses, excuses. I'm a bad blogger.
SO. Here she is, California Dreamin, in all her FMQ'ed glory.
This is the first time I've edge-to-edge free-motioned a quilt this big. I have to say it turned out better than I expected!
The back is an amalgam of Denyse prints from Joanns (that middle yellow flower is such a fave of mine!), and some pearl bracelets. It took me ages to decide what to bind it with (a really long time... remember this?), I really wanted to do something colorful, but everything I tried competed with the top too much. So I just threw in some scraps from the leaves and used the dark gray pearl bracelets. I love how it turned out!
I know it's not a Christmas quilt by any stretch of the imagination, but it's currently on the couch, along with Good Morning Starshine. They're friends. :-)
Stats:
California Dreamin
60"x72"
Fabrics from stash - Denyse Schmidt, Juliana Horner, V & Co, Lizzy House among others
Pieced and quilted on my Bernina with Aurifil 2600
But then the Christmas rush started.
And then I became obsessed with knitting.
And then finals.
Excuses, excuses. I'm a bad blogger.
SO. Here she is, California Dreamin, in all her FMQ'ed glory.
The back is an amalgam of Denyse prints from Joanns (that middle yellow flower is such a fave of mine!), and some pearl bracelets. It took me ages to decide what to bind it with (a really long time... remember this?), I really wanted to do something colorful, but everything I tried competed with the top too much. So I just threw in some scraps from the leaves and used the dark gray pearl bracelets. I love how it turned out!
I know it's not a Christmas quilt by any stretch of the imagination, but it's currently on the couch, along with Good Morning Starshine. They're friends. :-)
Stats:
California Dreamin
60"x72"
Fabrics from stash - Denyse Schmidt, Juliana Horner, V & Co, Lizzy House among others
Pieced and quilted on my Bernina with Aurifil 2600
Friday, November 29, 2013
Quick Quilt-a-long!
I have a very quick finish for you today! Remember this picture from the other day?
Well, I had these Botanics charm squares that my LQS got from Market, and had them all spread out on my design wall waiting until inspiration struck.
Then I saw that Megan was starting a Giant Starburst Quilt-a-long.
BAM. Inspiration.
Now I know that this is a MINI giant starburst, but the essence is the same...
So I busted into these little babies...
And literally less than two hours later, I had this wonderful little lovely. After the mini I made for the Schnitzel & Boo swap, I was kind of stoked to keep on with these little bits of instant(ish) gratification.
I think I was successful :-)
I'm hoping to get some yardage of Botanics to use as backing and binding in the next few days, and this will quilt up pretty quickly, I think. :-)
Stats:
24x24
Fabric: Botanics by Carolyn Friedlander
Pieced with Aurifil 2600 on my Bernina
Friday, November 22, 2013
Nifty Gifty :-)
You may have heard that Kristi from Schnitzel and Boo is super awesome and organized a mini quilt swap! You may have seen a little sneak peek of what I made here, but I didn't want to give too much away until I got it in the mail and gave it a little time to get to the recipient.
I loved making this! It took me forever to decide what to do, but I decided that I should use this opportunity to try out new patterns and techniques. I've loved the Arkansas traveler block forever, and I would like to make a bed-sized quilt one day. I used the paper piecing tutorial from Lee at Freshly Pieced.
I used fabrics from my stash, and a good number of them were scraps from this project. (Which is still a WIP...) I backed it in some good ole pearl bracelets, and for the first time ever, I did circle quilting!
That was way harder than I thought. I think I started and picked out the middle swirling at least three times. Eventually, I figured it out. I used my walking foot for most of it and then went back in and backtracked to the center with FMQ. It's a little wobbly, but I'm pretty happy with how it turned out!
I forgot to put on a label, so before I finished quilting it I used one of the circles in the print as a label and wrote on it with a permanent fabric pen.
I also added some corner pockets so that she will be able to hang it with a rod if she wants to!
I put the binding on by machine, which I don't love (I much prefer hand binding!) but I'll be honest, I was a little pressed for time!
And in the tradition of Tales of Ineptitude, there were a few hiccups (taking out quilting notwithstanding). I chain piece binding as I put it together, and when I was putting this one together, I just grabbed for the next blue strip and sewed it on without paying too much attention. Oops. At least I got a good laugh at 3am. :-)
Tuesday, February 19, 2013
Quilting a monster
I started quilting my xplusalong the other day. It's definitely the biggest quilt I've ever machine quilted. I've done other big ones either by hand quilting or tying.
I'm doing a pretty simple straight line grid with the walking foot on this one, because I figured that would be the easiest based on its size. I'm using a really pretty pale pink Aurifil 50wt.
Yeah. Manhandling that beast through my machine was a lot harder than I expected! And I have a large harp machine!
Part of my problem is that my set up isn't ideal. My table is relatively small, and I don't have a drop-in table. The quilt kept catching on the edges of my extension table. I improvised with some tv tables to catch the edges of the quilt, and at one point I was using (clean!) rubbery gardening gloves to get a better grip. The process was getting smoother the more lines I did, but it's still going to take a lot of trial and error.
Monday, February 18, 2013
Feathers! ...or ferns?
I did some more fmq on my grandfather's quilt over the weekend. I tried feathers for the first time ever, as well as a double loopy meandering thing. The feathers went a lot better than I expected, though they came out looking more like ferns than feathers. They were really quick too! The double loopy meandering stuff didn't impress me as much - I need to work on making it more uniform. But a success in the end I suppose!
Sorry for the photo-laden post, but its kinda nice to see how the different patterns work together :-)
Tuesday, February 12, 2013
Rip it real good
I picked up my grandfather's quilt last night to work on the quilting. It had been pushed to the bottom of the pile while I was working on my sister's quilt and xplusalong. I'm really pumped to quilt Sunshine Daydream, but I really need to finish this one first.
So I started a while ago quilting with gray Konfetti in the top and the bobbin, but realized too late that I should have used red in the bobbin, to match the backing. So when I picked it up again, I did that. I started quilting and about 30 seconds in, I realized that the red was *juuuuust* peeking through the top, so I adjusted the tension and kept going for a few more seconds. Not bad, but it really bugged me. I need to fiddle with the new machine's settings for a bit before I try to quilt with drastically different colors like this. So I pulled the quilt out, and changed the bobbin again. Then I realized that if the back had four square inches of red thread and the rest was gray, it would really bug me.
So that's how 45 seconds of quilting became an hour of seam ripping. But hey, that's one of the reasons I put a tv in the studio, right?
You'll see in the pictures that I started with stippling, but decided to do some pebbling after I ripped that out. So I guess it's a good thing, right?
I love this backing, I scoured for it online with no luck and then happened to find it at one of my LQSs. It has little planes on it - my Grandfather is a retired AF pilot. It was tough finding an airplane print that wasn't cartoony!
Friday, November 30, 2012
Finished Sampler
As I mentioned yesterday, I finished the wedding ring sampler! I feel like this one has been a long time coming. It was never intended to be anything more than a 'test' for a template set, but it definitely became more than that. But because it wasn't considered a 'real' project, its never taken top priority - it mostly sat in a pile of stuff I didn't know what to do with. But it's done now!
I finished the binding last night. Isn't hand stitched binding neurotically delicious??
I love the quilting. It's certainly not perfect, but it makes me feel like I've got a good start on figuring out FMQ.
My favorite section is the wood grain! Courtesy of Angela Walters!
New things I learned during this process: piecing curves(!), using templates, free motion quilting, bias binding, and inside corners (which did NOT turn out all that great... apparently you have to plan ahead for those kinds of things for the front of the binding and the back to work well together!)
So I think this turned out to be a pretty fun accidental project!
Thursday, November 29, 2012
What I did last night
I've said before that I do most of my quilting at night, so that explains the crusty-bad-lighting pictures. I apologize!
Last night I was working on several things, and actually made pretty good progress on two projects, and finished a third! Woot woot!
First, I finished quilting the top of the blue quilt. I'm going to wait to show it to you until it's finished, because the quilting of this one is going to tell a lot of the "story" of the quilt. But here is a teaser of some of the scraps. ;-)
I also started quilting my Grandfather's quilt - the red and gray one. It is VERY different machine quilting a "real" sized quilt than it is working on a small sandwich or something. It's going to take some figuring, especially with my current setup. I'll save that for another post. It's a good start though.
After my shoulders had had too much of sitting at the machine, I hand stitched the binding on the yellow sampler. Which didn't get finished over Thanksgiving (big surprise...) so that one is officially done!
Yay for productivity!
Labels:
Finishing,
Free Motion Quilting,
Machine Quilting,
quilty bits
Tuesday, November 20, 2012
Practicing
After I basted the gray and red quilt, I decided that I needed to practice some more FMQ before undertaking the quilting on that quilt (which is going to be a gift, so I'd like it to be marginally presentable...)
I pulled out a practice run of a double wedding ring pattern that I was trying out, and used each of the sections to quilt a different pattern. I tried to free motion some outline quilting in the yellow parts... that didn't work out so great... But the rest of it came out pretty well.
I have to say, it was way fun!
We'll see how I feel after I've quilted all 3,250 square inches of the gray and red quilt...
Friday, November 9, 2012
Free Motion Quilting for Dummies
I took my first ever class with my machine this past week. I've only taken one class ever, and that was a hand applique class. This was a free motion quilting class, since I've definitely caught that bug! I've been doing a lot of research and blog reading and youtube watching, and needed a little bit of direction in person to get started. A couple of weeks ago, I did my first little bit of free motion, just tracing the design on a large-scale print, which I did while I was making the cover for Marsha Sue.
The day after the class, I gridded off one of the sandwiches I had made and gave it another good ol' college try. Much better this time, but still a long way to go!
This class was a really good experience, though a little intimidating! I learned that I've been winding my bobbin wrong for yeeeaaaars! It was funny coming in and seeing all these other women with their crisp white fancy machines, and then mine with it's nice "vintage" patina. Hahaha.
So Marsha does NOT like FMQ. I feel like most of the class time I spent dealing with broken threads and mangled bobbin thread. I also learned that the tension on my machine is seriously jacked up. I just never knew it because that's all I've ever known! We made it happen eventually though.
Anyway, here is the fruit of my labor. Not impressive, to say the least!
The day after the class, I gridded off one of the sandwiches I had made and gave it another good ol' college try. Much better this time, but still a long way to go!
Labels:
Free Motion Quilting,
Machine Quilting,
quilty bits
Saturday, October 20, 2012
Machine quilting! Yeah, I did that!
So I'm traditionally a hand quilting kind of girl, but if course, at some point one realizes that I could get a whole lot more done if I let my machine do most of the work. So last week I started a long overdue project - a sewing machine cover - and let that act as my first foray into machine quilting.
Before I could do that, though, I had to get my machine ready. I work on a 1978 Singer Stylist 543. Her name is Marsha Sue and she belonged to my mother. This is the machine I learned to sew on, and the only one I've ever used.
Now, Marsha Sue is a workhorse, that's fo sho, but since I've only ever done piecing, I don't have any fancy feet, like a walking foot or a free motion foot. I didn't even know if I would be able to find feet that would be compatible. Long story short, after some research about shanks, I was able to find both of those feet very easily and for less than $30 for both. Win.
So thus begins the machine quilting. I started out doing some straight line quilting with the walking foot, which actually turned out pretty well.
After the straight line quilting (which Marsha Sue didn't appreciate), I just traced the flowers in the center panel design as my first free motion attempt. Not too shabby - I expected MUCH worse!
The finished product turned out better than I expected!
Labels:
Free Motion Quilting,
Machine Quilting,
quilty bits
Subscribe to:
Posts (Atom)